Editing User Groups
To edit user groups, click on the  Account Settings icon in the upper right corner of the screen. Choose the Manage Users option. This action will take you to the Manage Users page.
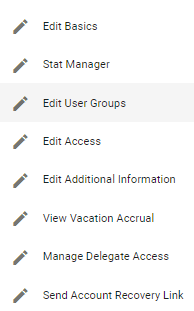
Click on the  button next to the user’s name in the list displayed on the Manage Users page then click on the
  Edit User Groups option.

This will prompt Physician Scheduling to populate a pop-up Edit User Groups box.
You may choose a core group by picking an option from the Choose Core Group drop-down menu and by checking all the group boxes that apply from the list of groups provided by Physician Scheduling.
Click on the  button when done.
A pop-up alert will let you know the changes were successfully saved.

Video Tutorial: Edit User Groups
How do I change a user's user groups in Physician Scheduling: A short video of editing user groups